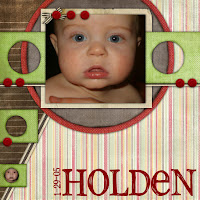
My nephew in 2005.
Credits
Shabby Miss Jenn's two kits
Birds of Paradise & Bohemian Traveler
Welcome to the Shabby Miss Jenn Designs Team Blog!
Fun Photo Blending Tutorial...
I was working on a layout this morning and thought I would share a piece of what I did in a tutorial. Here is the item for the layout I created...
I love the cardboard scrap accent from Shabby Miss Jenn's Cherrywood Farm Kit... this morning I was looking at the photo I wanted to use for my layout and thought it would be fun to sort of blend it into the cardboard scrap to frame my photo. So here is how I did it in Photoshop (I use Photoshop CS2 but this could be adapted for other versions) -
First things first - open your photo and the cardboard scrap from the Cherrywood Farm Kit. Create a new transparent document by selecting FILE>NEW>and then size it around 10x10 inches with a transparent background.
Next move your photo and cardboard scrap to your new document. If you are using a horizontal photo you will need to rotate the cardboard to a horizontal position by selecting EDIT>TRANSFORM>ROTATE.
Make sure the photo layer is selected and use the slider on the layers palette to change the opacity to 55%. Press CTRL-T to re-size your photo on the cardboard - make sure you hold the shift key down to keep the proportions correct.
Select your brush tool and bring up the brushes palette. Click the right arrow and choose the Dry Media Brushes - append them to your current brushes. As you scroll through the brushes - choose the brush titled Conte Pencil on a bumpy surface and set the master diameter to 75 and adjust the flow to 33%..
Next add a layer mask to your photo layer (click the button with the circle inside a rectangle at the bottom of the layers palette) and with the brush selected, begin brushing on the layer mask to hide the photo edges and blend the photo with the cardstock.
About halfway through it should look like this...
When you have finished brushing the edges, change the opacity of the photo layer back to 100%. Fine tune your photo blending. If you make a mistake, choose a white foreground color and use your brush to brush the photo back in where you masked it out before.
If you wish, change the opacity of your brush to 37% and brush around the edges again to blend the photo. Merge the layers together by pressing CTRL>SHIFT>E and then move it to your layout - this is how I used the finished item in my layout...
Credits for the layout -
Scalloped frames (red recolored) and Goldenrod paper are from Shabby Miss Jenn's Gracie's Garden Kit
Tropical Grass, Tropical Berries papers and Tab Line Paper are from Shabby Miss Jenn's Birds of Paradise Kit
Cardboard Scrap is from Shabby Miss Jenn's Cherrywood Farm Kit